Send a customized thank-you message to donors and ticket purchasers
Learn how to send a customized thank-you message to donors and ticket purchasers.
Before you get started
Video Overview
Walkthrough
Before you get started
Video Overview
Walkthrough
Before you get started
Video Overview
Walkthrough
Before You Get Started
Video Overview
Walkthrough
Your donors and event attendees believe in your mission; they give to your nonprofit to help make a difference. Responding with a personalized thank-you message as part of the receipt is an effective way to make sure all donors and ticket purchasers know how grateful your organization is for their contributions. Additionally, a thank-you message reinforces your mission, highlights every donation's positive impact and encourages long-lasting support.
Custom thank-you messages can be created for both Campaign Pages (see below) and Event Ticketing pages (see further below).
Campaign Pages
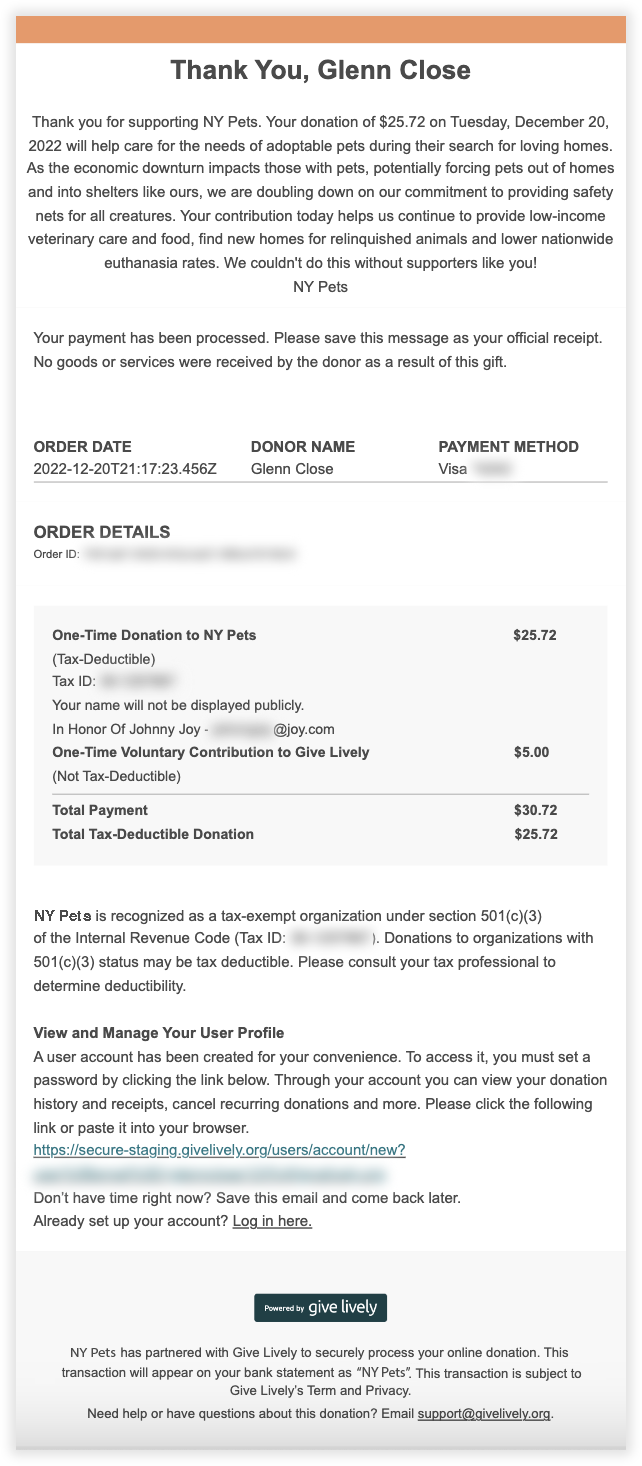
When a donor gives to your organization via a Campaign Page, Give Lively automatically and immediately sends a receipt to the donor that:
- summarizes the donation for tax purposes
- provides a link to a User Portal through which donors can directly and securely view their donation history and receipts, and manage recurring donations
- allows for a customized thank-you message that shows gratitude, reinforces your mission or touches on the donation’s impact.
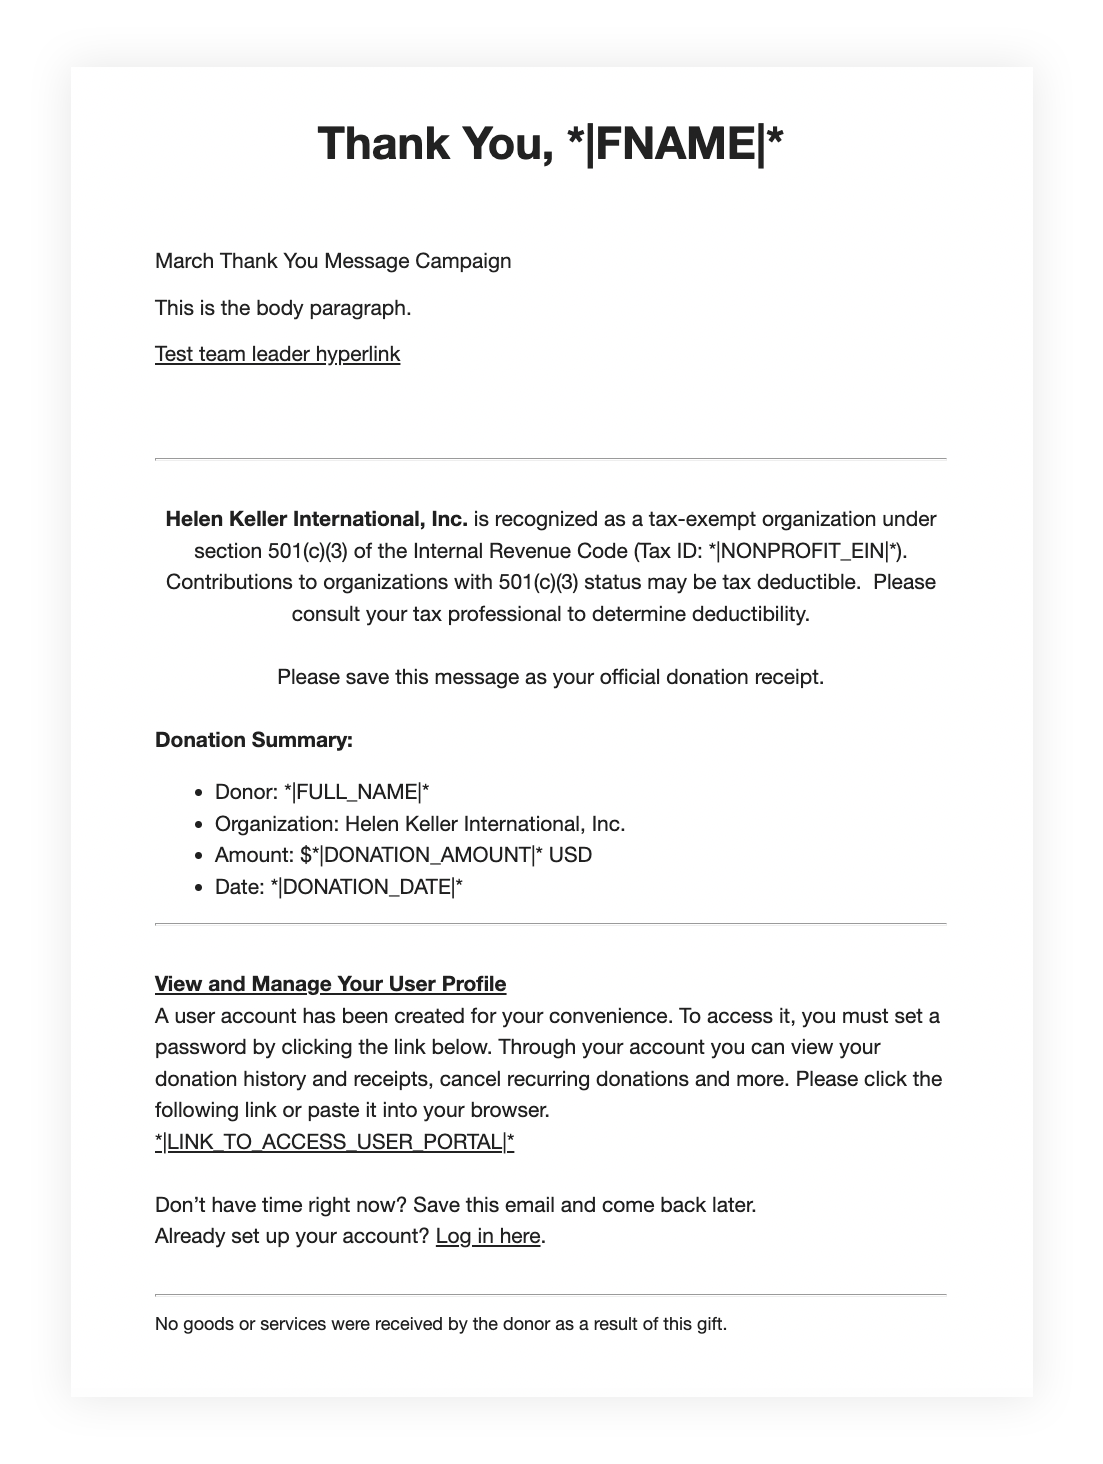
Example of a Campaign Page thank-you message
To craft a customized message
1. Log in to the Nonprofit Admin Portal.
2. Click “Campaigns” in the navigation bar at the top of the page.
3. To create a new page, click “+ Create Campaign Page” and follow the steps to build your Campaign Page. To edit an existing page, find the desired campaign and click “Manage” to the right of the campaign name.
4. When you are ready, click on the “Thank You Message” tab in the lefthand menu.
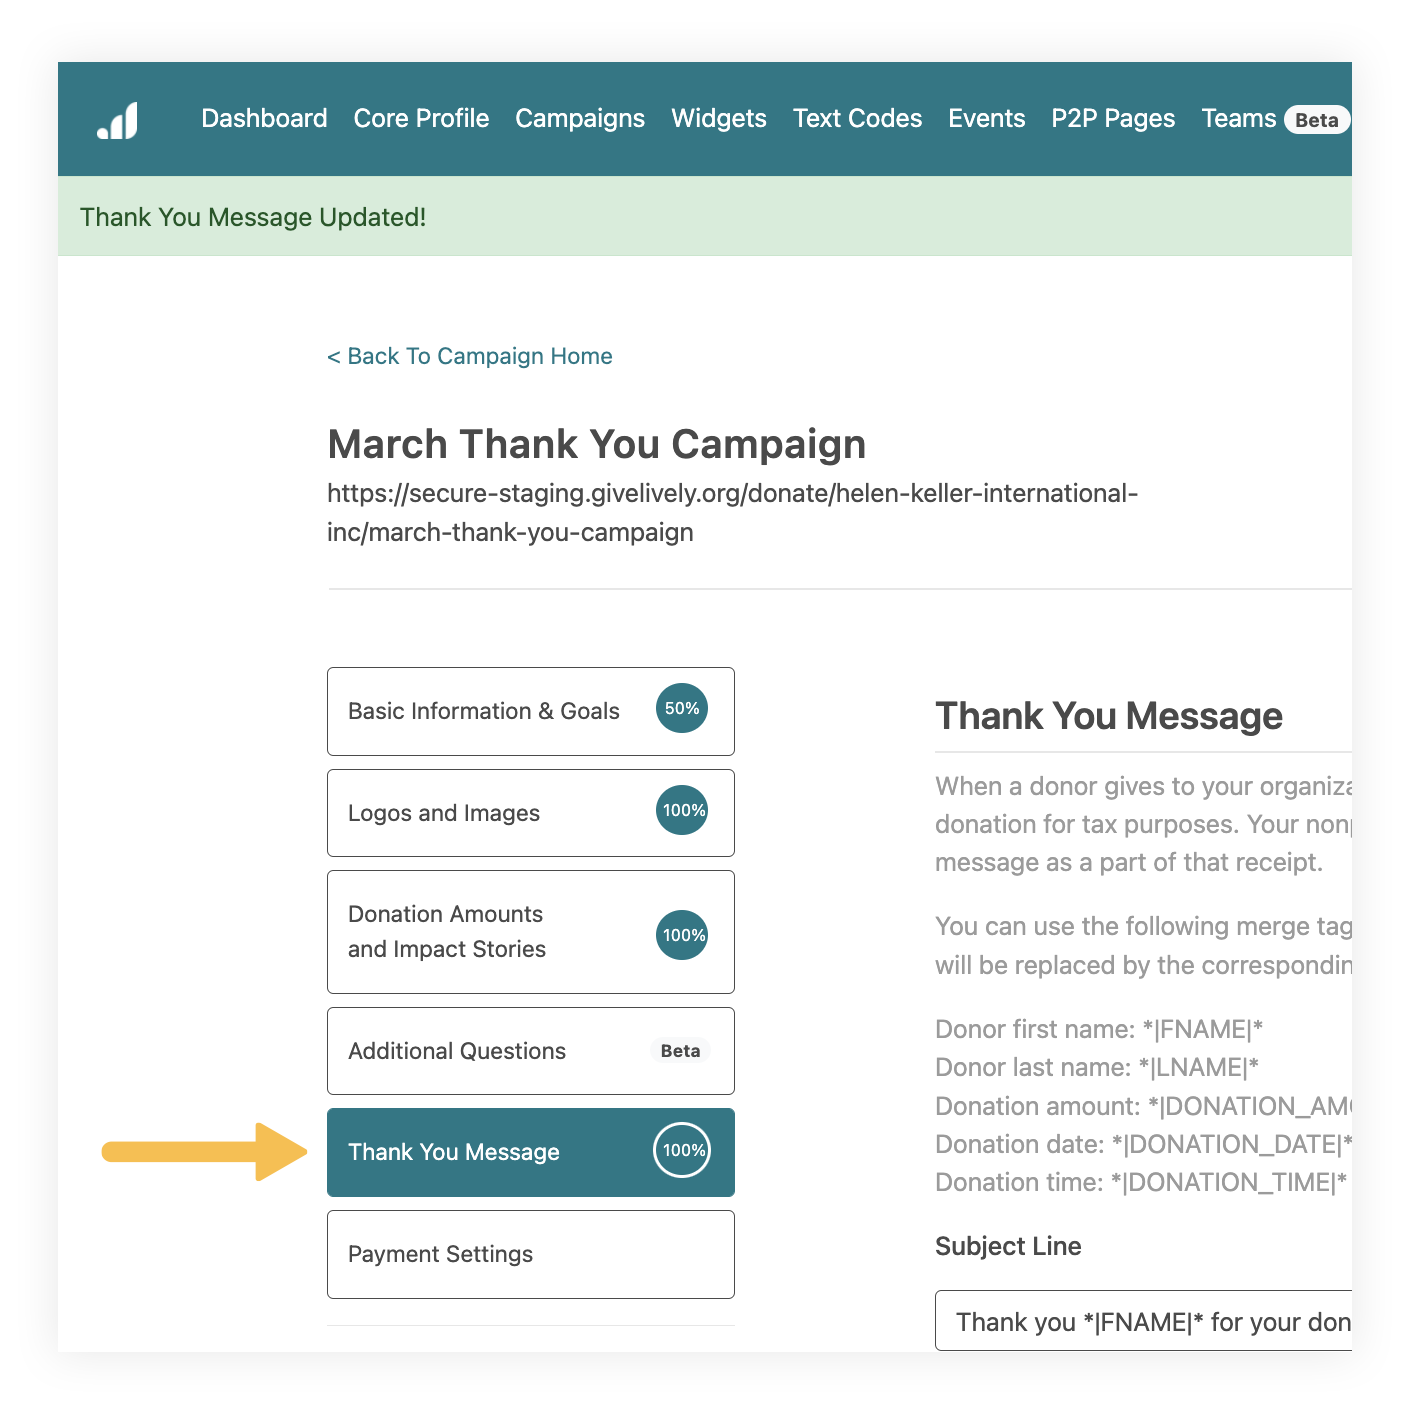
5. Fill in the provided fields – "Subject Line" and "Body Paragraph" – with your written thank you. You can use merge tags in the subject line or body paragraph of your thank-you message. They will be replaced by the corresponding donor information when the email receipt is sent.
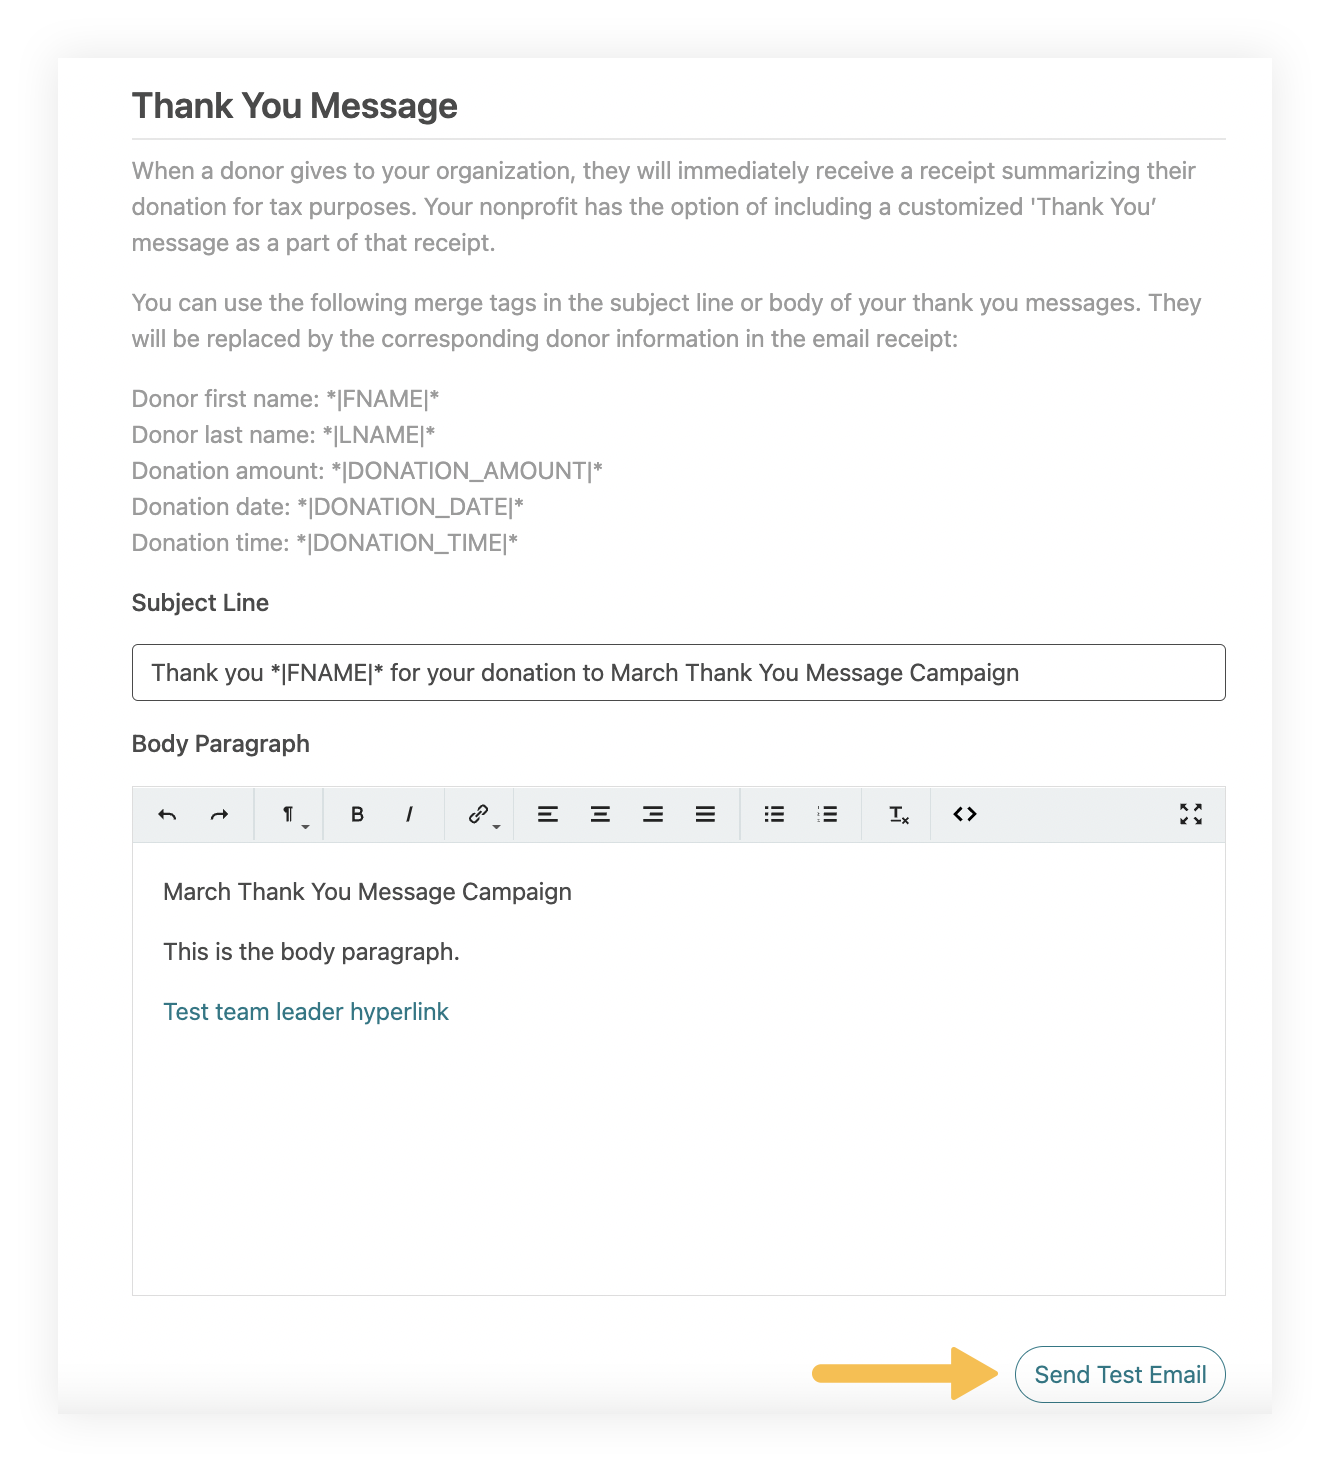
6. To send a test email, click the "Send Test Email" button beneath the "Body Paragraph" field. A test email will be sent only to the address of the person logged in to the Nonprofit Admin Portal. In the test email, merge tags (NOT actual data) will show in the Donation Summary section, so seeing the merge tags is not a cause for concern. When thank-you emails are sent, the merge tags are replaced by information provided by donors during the payment process. That being said, even in the test email the nonprofit’s name and the tailored body text will appear.
7. Add a reply-to email address that will appear on all donation receipts.

8. Hit "Save" when you're done.
Event Ticketing pages
When a donor gives to your organization via an Event Ticketing page, Give Lively automatically and immediately sends a receipt to the donor that:
- summarizes the donation for tax purposes
- provides a link to a User Portal through which donors can directly and securely view their donation history and receipts and manage recurring donations
- allows for a customized thank-you message that shows gratitude, reinforces your mission or touches on the donation’s impact.
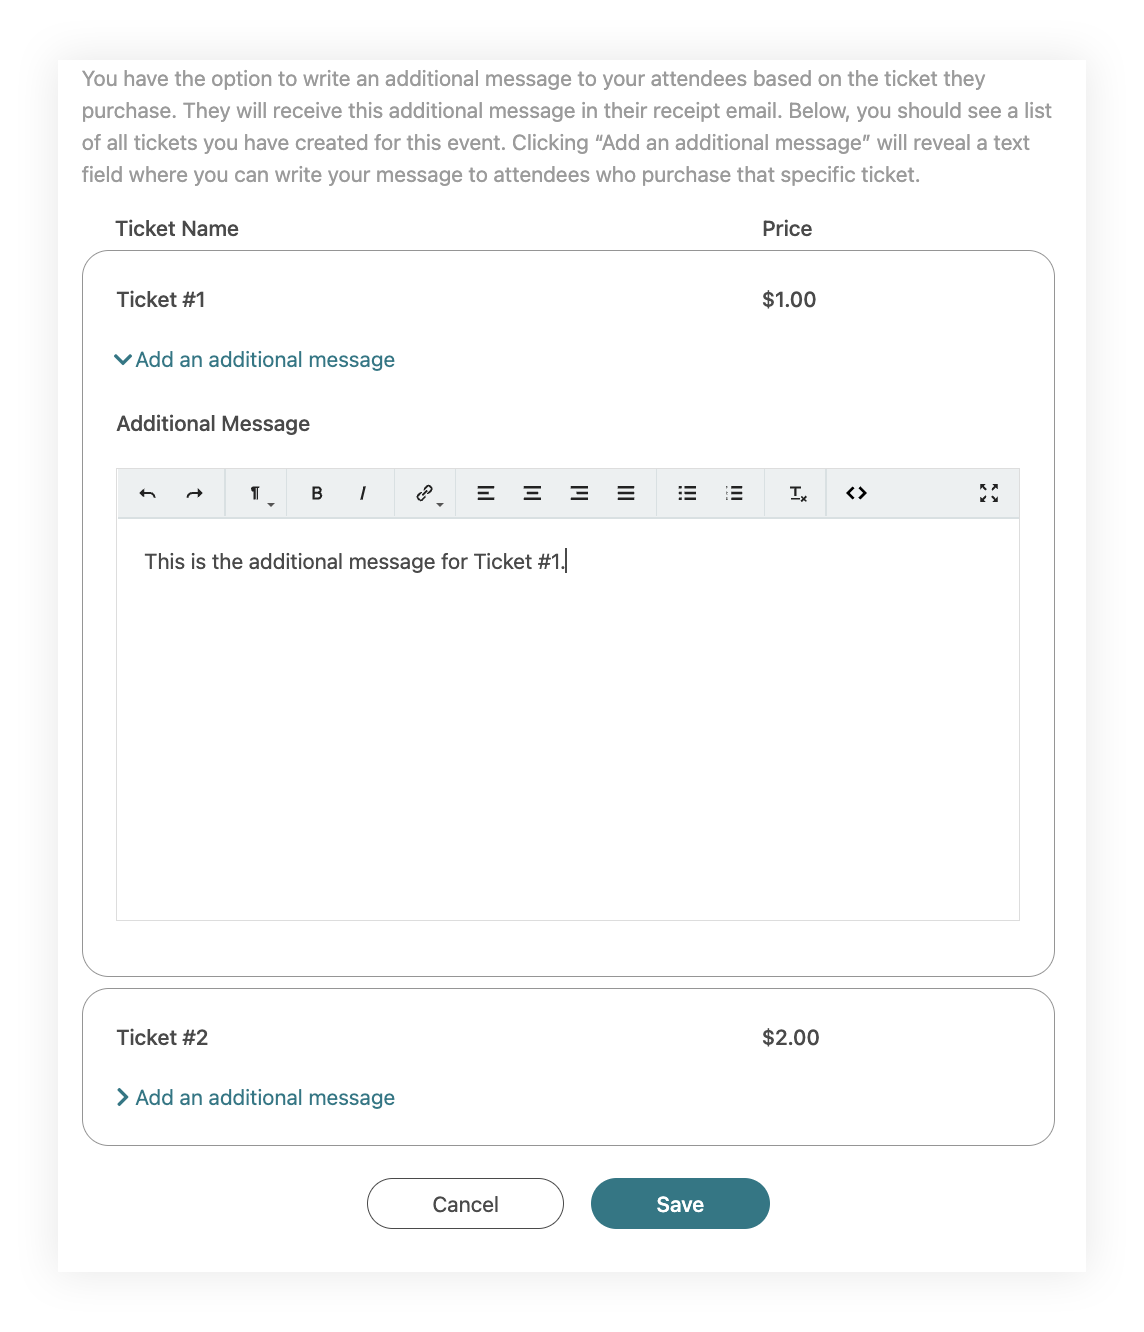
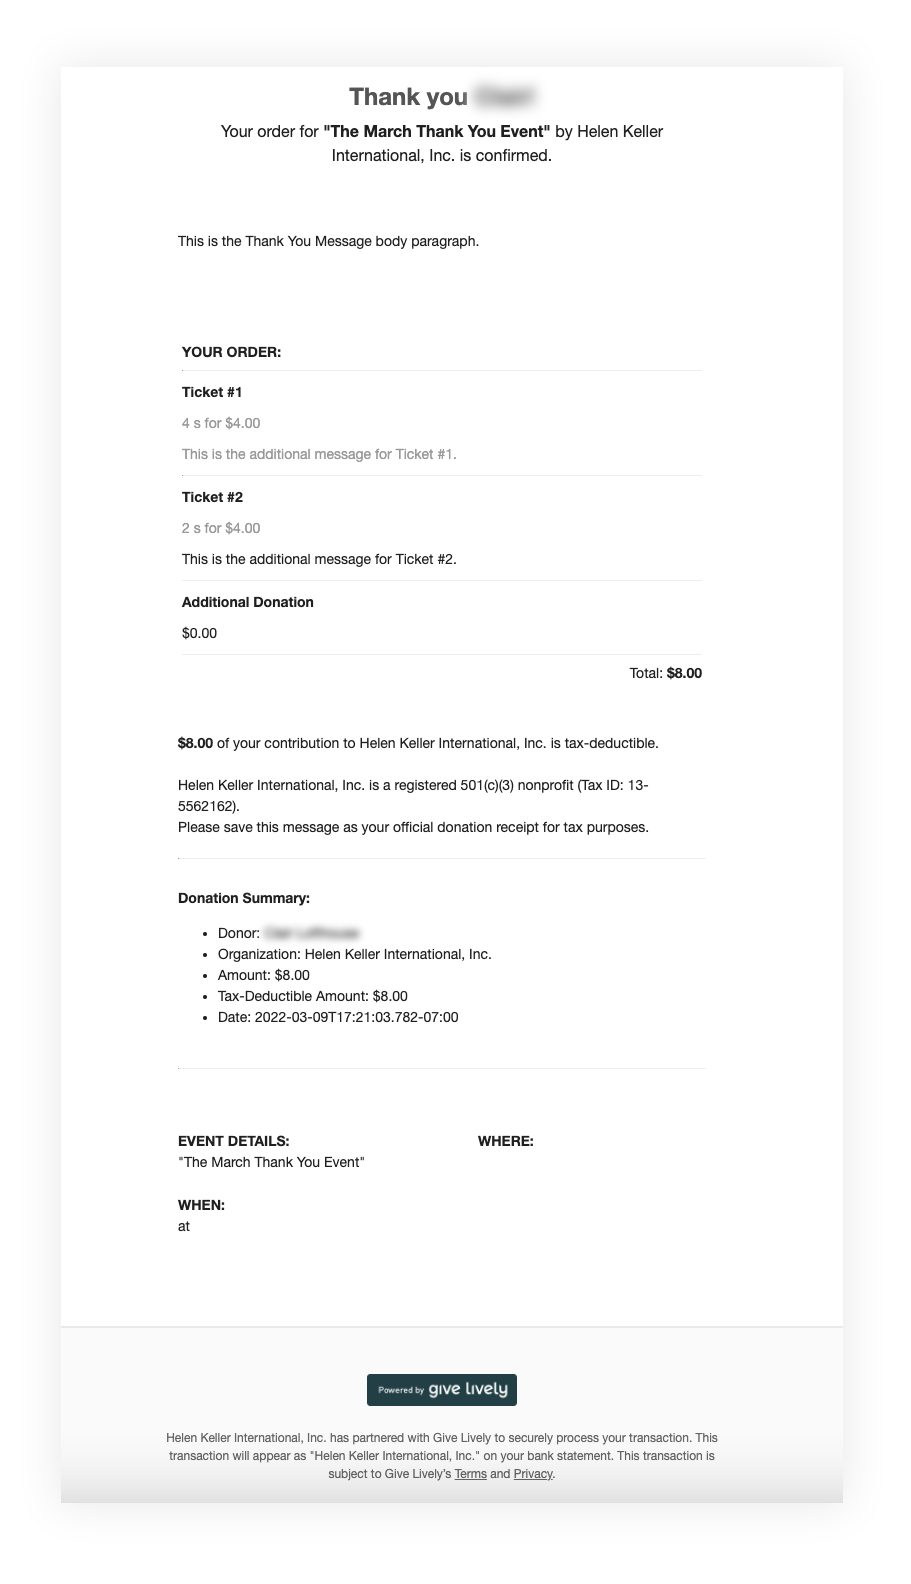
An Event Ticketing receipt is slightly different from a Campaign Page receipt. It does not include the sentence “No goods or services were received by the donor as a result of this gift.” This accounts for the sale of event tickets, the fair market value of which is not usually tax-deductible. Another feature that differs is the ability to add an additional message for attendees who buy specific types of tickets.
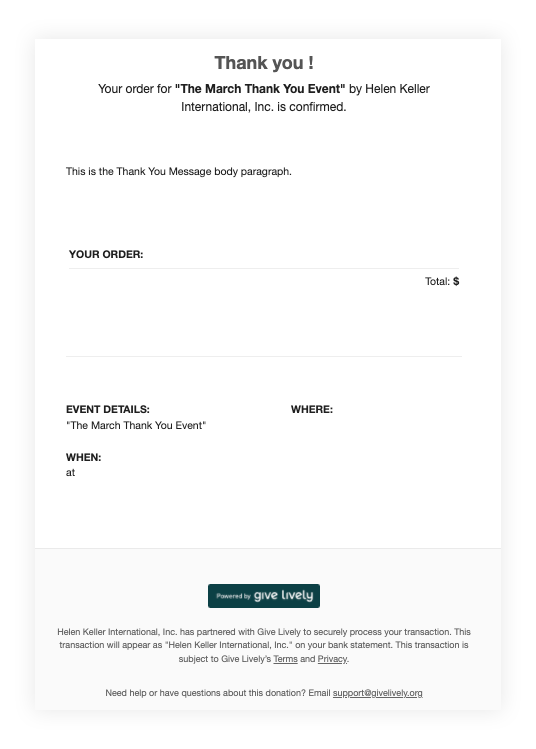
Example of an Event Ticketing page thank-you message
To craft a customized message
1. Log in to the Nonprofit Admin Portal.
2. Click “Events” in the navigation bar at the top of the page.
3. To create a new page, click “+ Create Event” and follow the steps to build an Event Ticketing page. To edit an existing event, find the desired event and click “Manage” to the right of the event name.
4. When you are ready, click on the “Thank You Message” tab in the lefthand menu.
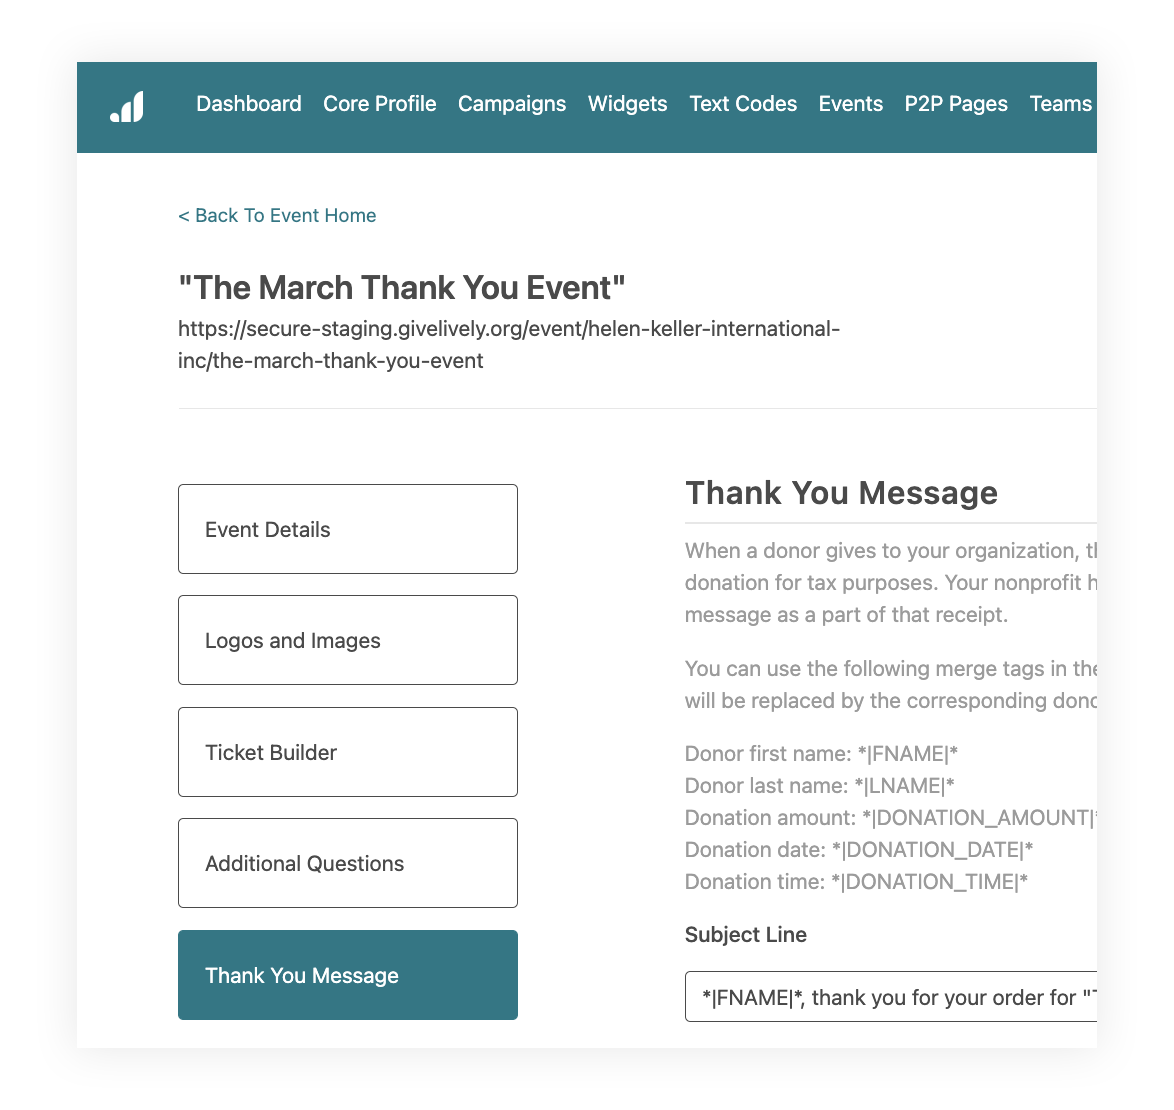
5. Fill in the provided fields – "Subject Line" and "Body Paragraph" – with your written thank you. You can use merge tags in the subject line or body paragraph of your thank you messages. They will be replaced by the corresponding donor information when the email receipt is sent, immediately after the ticket purchase.
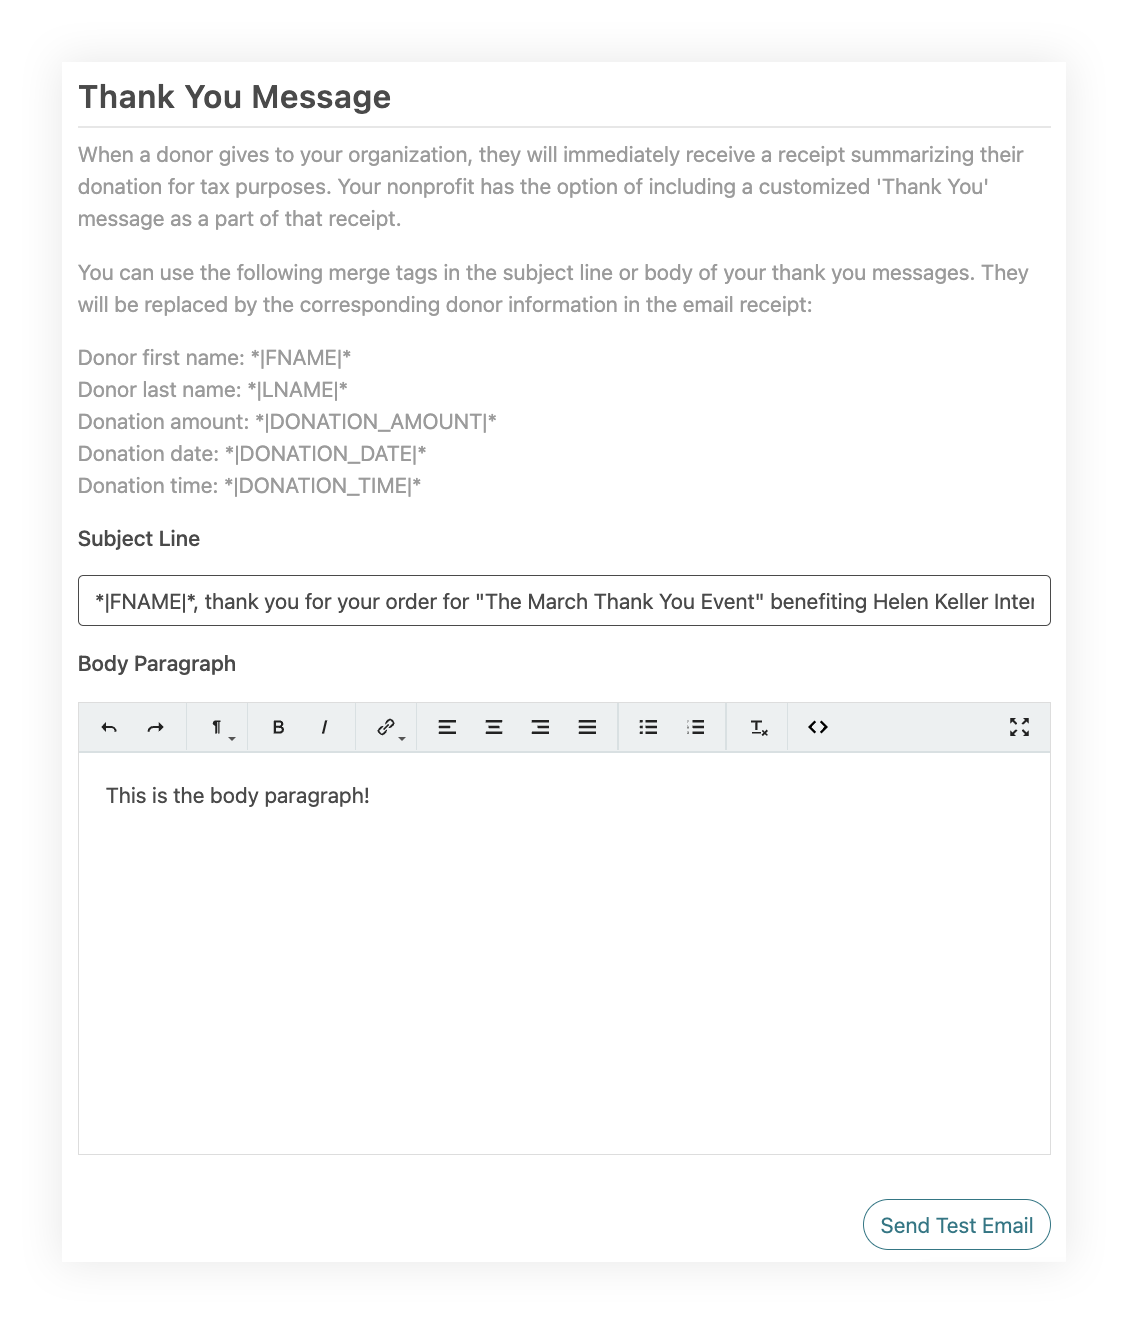
6. To send a test email, click the "Send Test Email" button beneath the Body Paragraph field. A test email will be sent only to the address of the person logged in to the Nonprofit Admin Portal. In the test email, merge tags (NOT actual data) will show in the Donation Summary section, so seeing the merge tags and no ticket purchases under “Your Order” is not a cause for concern. When thank-you emails are sent, the merge tags are replaced by information provided by donors during the payment process. The test email will also not show each ticket type or the additional custom message (see step 8). That being said, even in the test email, the nonprofit’s name and tailored body text will appear.
7. Add a reply-to email address that will appear on all donation receipts.

8. Click “Add an additional message” under each Ticket Name to set up additional thank-you messages for attendees who buy specific types of tickets. Keep in mind that the test email will not show each ticket type or additional custom messages, as can be seen in the example under step 6.
